Layout Options
In this view, most of the settings regarding the layouting and rendering process of both Simple Bill and Smart Bill can be changed. As a result, they significantly influence the presentation of the document for the respective company and their end customers. The settings of the default layout can be changed, individual sections can be moved or hidden or new sections can be added in order to adapt the receipt to individual requirements.
Layout Options are the only settings that are also stored historically. This ensures that receipts that have already been issued retain their original layout even if the latest settings are changed. In addition, future options can be prepared in advance (e.g. for relevant occasions such as Christmas, Easter or Black Friday events).

View Selection
Different layouts, depending on the desired output device or print format, are currently only available in the Simple Bill. The Smart Bill uses a single layout.
For more details, please see the View Options for Simple Bill
Live Preview of Bill
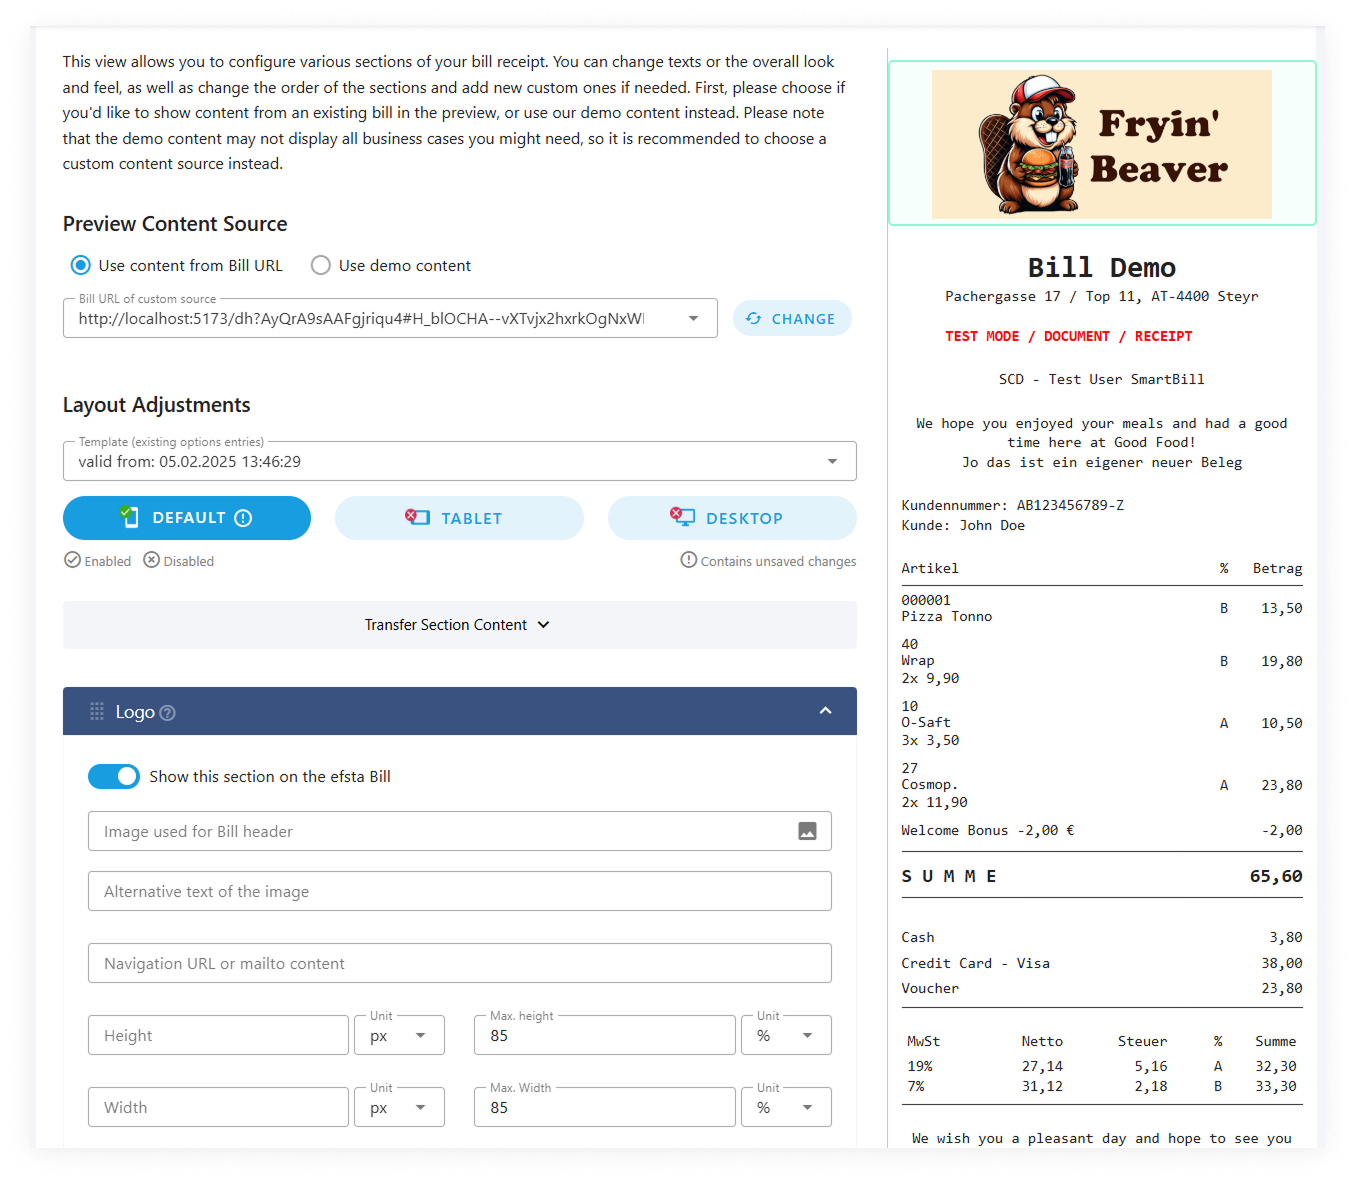
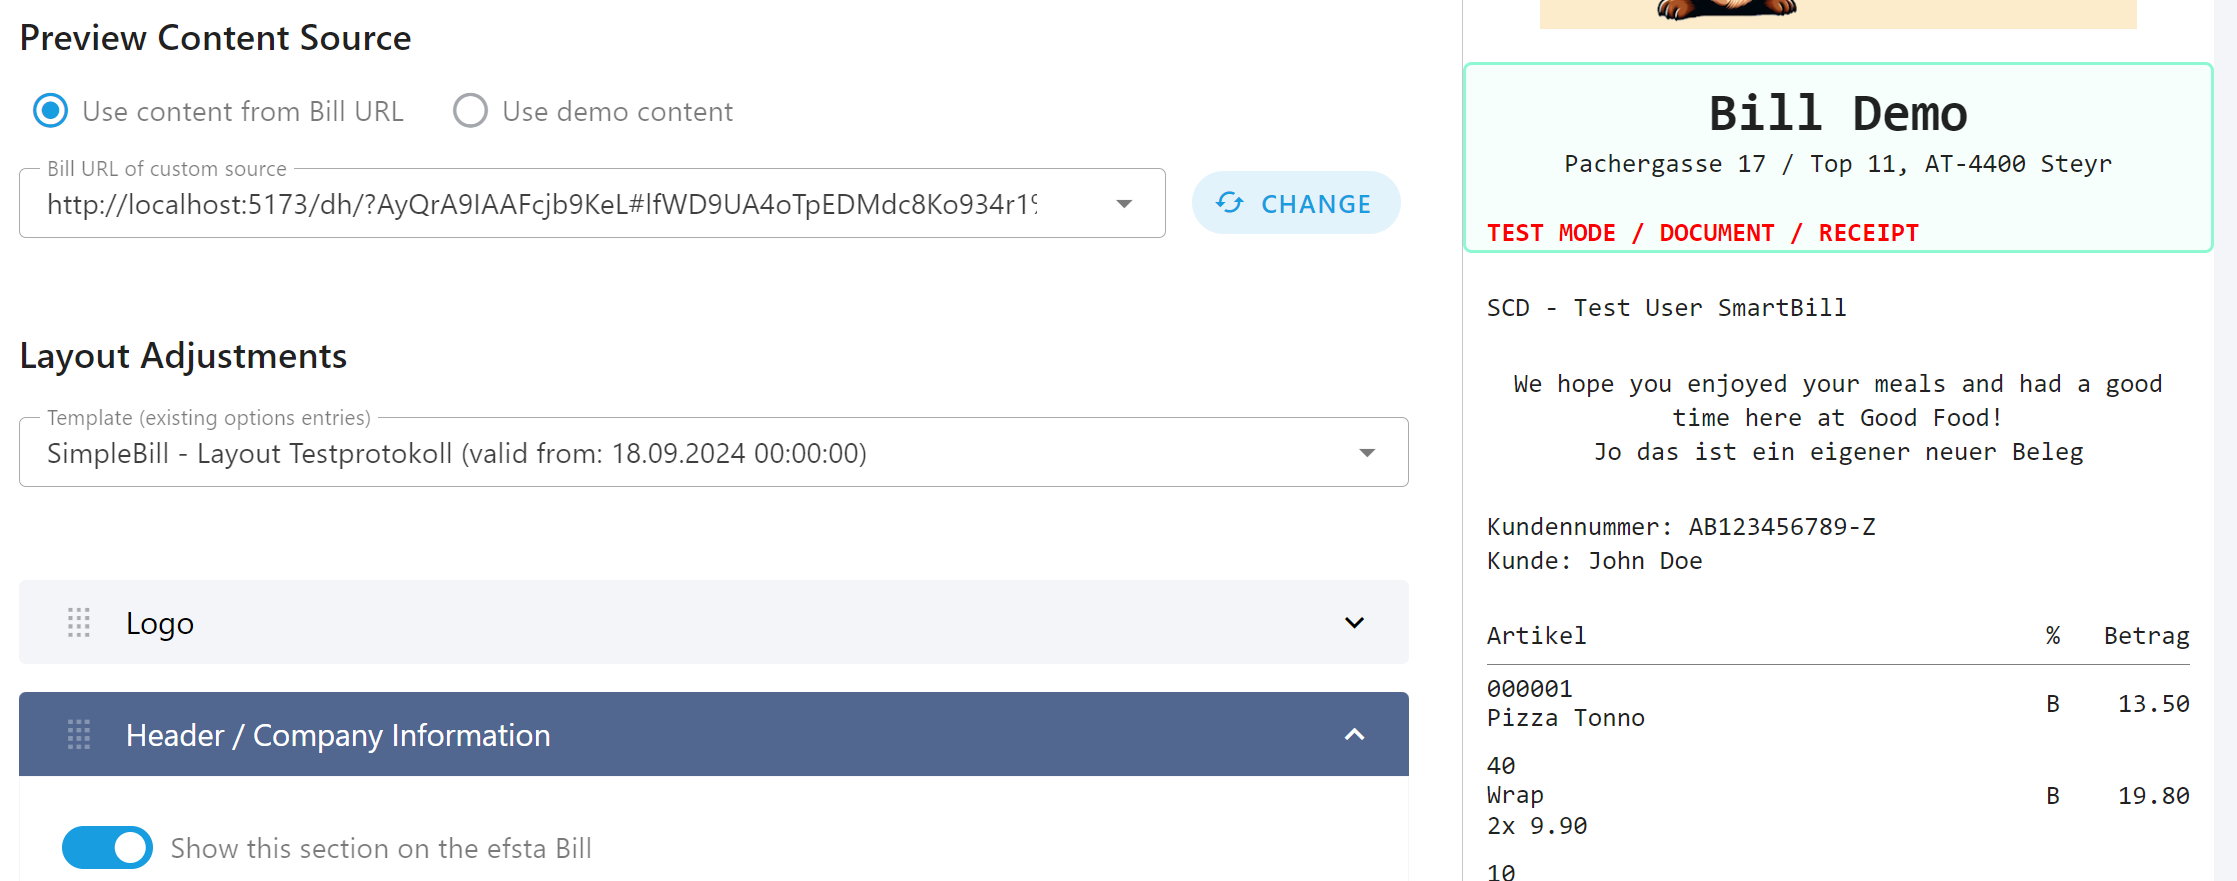
At any time while working in the settings, the changes made are immediately displayed in the preview area on the right-hand side of the page (or on the bottom of the view on mobile devices). To enable this live preview, a valid Bill has to be chosen. This can be don in the corresponding part of the designer view and has two options: "Use content from Bill URL" or "Use demo content".
Source: Bill URL content
The first option is the recommended one, as it allows seeing the actual layout with one of the companies own receipts. This immensely improves the quality of the configuration process as no additional testing in a parallel window or devices is required. Every test EFR can be used to generate a valid Bill source for that purpose. The five most recent Bill URLs that have been used will be stored locally and can be reselected via the dropdown for e asy use in later configuration sessions.
To use this functionality, you only need a correct Digital Receipt link (in the form https://bill.efsta.net/dh?DOCUMENT_HANDLE#DOCUMENT_KEY).
You receive this link from the EFR with the local route http://localhost:5618/recorder/lastdh. This provides the efsta Digital Receipt link for the
most recently generated receipt from the EFR. The entry of the Bill link must be confirmed in the Management UI by clicking on the "CHANGE" button.
Please note that the receipt data must either originate from a test EFR installation or any of the "Bill" feature must be configured for the company and/or the EFR. If this is not the case, the receipt data cannot be retrieved and a preview with this receipt is not possible for the time being.
Info for determining the voucher link on the EFR:
If a multi-client EFR (multiple POS or multiple companies on a single EFR installation) is used, the correct client must also be specified as
the parameter ?rn=CLIENT in order to obtain the correct document link.
Source: Demo content
The second option is the usage of a predefined demo Bill, that efsta provides by default. They can be used, however they will most likely not represent the exact use case of a company as they contain just some basic receipt data (one per country, country is determined by the company the layout editor has been opened for). It is recommended to only use the demo content only for testing purposes (e.g. during an evaluation process) or if there is no way to get a proper Bill URL from an existing EFR. When starting to work on the real layout settings, this option is not recommended!
Please keep in mind that the Bill (depending on the company options chosen) might also be available in light and dark theme. To get a better idea of how the Bill might look like, the theme can be switched using the corresponding option in the "..." menu in the application title bar.
The preview of the Bill can sometimes not align with the section that is currently being edited. To be able to move the preview to fit your current changes, the "move" button in the application title bar can be used to realign the preview with your current scroll position.
Highlight of current section
As soon as an area is opened for editing, the corresponding area in the document is highlighted in the preview. This should make it even clearer where exactly the current options will have an effect later on. If no data is available for an area, the position where the content would actually be is still highlighted - so that the positioning can be viewed, for example. Only if the section is hidden (via options of that section), no highlighting can be seen.

Templates / existing options
If settings for the layout have already been saved, these historical options can be selected from a dropdown list. These are then used as a template for creating the new settings. For example, the Christmas settings from the previous year can be loaded and used for the coming Christmas season and modified if necessary. To better identify the layout, a name can be chosen when saving a new set of options on the bottom part of the view. This name will be used as a name in the dropdown list. If no name has been provided, the date on which the validity of the options start will be used instead.

Keep in mind that selecting an existing entry from the template dropdown does not mean, that this set of options will be edited and update! Applying changes will always result in a new set of options being stored with its own validity!
Customizing the Bill layout
The actual receipt layout is divided into several areas (so-called sections). Each section has its own set of settings and customization options and covers a specific area of the document (e.g. in relation to data from the ESR or a specific ). Sections that are delivered as part of the layout standard cannot be removed. However, they can be hidden with the respective option in the area settings if they are not desired. User-defined areas can of course also be deleted as desired.
Please note that, depending on the country, certain areas are required for a fiscally correct receipt and may not be hidden. Your efsta Partner Manager or Consultant can help you with this.
In order to achieve the best result with the Digital Receipt, you should try out as many options and settings as possible to get a feel for which settings have what effect. By adjusting the preview immediately after a change, it is worth trying out all the options!
Setting up sections
There are various different, customizable options for every section on your Bill. Different sections are available for both Simple Bill and Smart Bill. For more information on each section and its correlating settings, please go to the correct documentation page for more details (Simple Bill or Smart Bill).
Changing the order
The order of the areas can be adjusted by dragging and dropping the icon on the left-hand side of the area. A preview of the new position is displayed when dragging and the preview is also updated immediately after releasing it at the desired position.
Adding additional sections
In addition to customizing the existing areas included in the standard, there is also the option of adding custom, user-defined areas. These include texts and images, as well as QR codes and barcodes in many standards. Compared to the standard areas, these manually added areas can not only be hidden, but also deleted again.
Saving and Planning options
The settings made are generally saved with immediate validity. However, this behavior can also be adjusted in the UI in order to make planned or historical changes in advance. There are three options for this when saving:
Settings apply from now on
This is the standard selection. The changes made are saved with immediate effect. All vouchers that were created previously will continue to use their previous settings, but all new vouchers created after saving will now use the current settings.
Settings apply from the specified date
This makes the current settings valid from a set date (incl. time). This can be a date in the future (e.g. January 1st of the coming year) but can also be a date in the past. Changes however cannot be made for the past. The first selectable date will always be the current date. This means that old layout options cannot be overwritten. This is because of legal reasons as Bills already issued and possibly viewed by customers must not change (as least for the Simple Bill).
Example: On 01.01.2025 a rebranding of the company is taking place and the logo of the bill should be changed. To plan this accordingly, before 01.01.2025 the new logo can be uploaded and set in the options and be save with "valid from" information 01.01.2025.
Settings are valid for the specified period
In contrast to saving from a specific date, a time range can be specified with this option. In contrast to the individual "valid from" date, the document is only scheduled in advance for a fixed period (e.g. for a specific occasion like christmas or black friday). After the period has expired, the document layout valid before the tha start of the currently selected period is automatically used again. Manual changes after the period (e.g. christmas) has ended is not required.
Example: On 01.10.2024 a new set of layout options for christmas can be configured, containing an additional image and text section with christmas-related information and discounts. This can be saved to be valid between 01.12.2024 and 24.12.2024. After that, the layout that was valid on 30.11.2024 will be used again.
When saving a set of options, the Digital Receipt Management will check whether there are other options that are valid AFTER the given validity period. If that is the case, an information dialog will show up informing the user about this issue and ask on how to continue. The user can choose to keep the existing ones and do not touch them or select to overwrite them (by setting them as "inactive", so they will not be applied any more on effected bills). Due to the fact, that no changes can be made for the past, no already existing Bill instances might be affected.

Example: A document layout has been set for October (Halloween) and December (Christmas). A new setting set is now saved with a "valid from" information 01.11.2024. The application will inform the user that there is one existing set of options (December) and the user can decide how to resolve this issue (by either invalidating the December configuration or keeping it):
- Choosing to keep the December configuration will result in the newly save one only being valid in November
- Choosing to invalidate the December configuration will make the November set of options the new default starting fom 01.11.2024
Please note that the time is always entered in the local time of the browser and/or device for the respective options. This is particularly important when planning your release if a company creates vouchers in different time zones.
Next Steps
Layout Sections for Simple Bill
Layout Sections for Smart Bill
Appendix
Changing the Bill logo
In version v1.x of the Digital Receipt Management, the Bill logo was part of the overall options. As of version v2.x of the Digital Receipt Management, the upload for a dedicated logo has been moved to the dedicated section (see Simple Bill or Smart Bill section documentation).